- Joined
- Jul 11, 2008
- Messages
- 5,769
- Points
- 48
<p><img src="http://media.englishrussia.com/112012/internalcombustionenginecan/internalcombustionenginecan-17.jpg" alt="" /></p>
<p>Let us show you how to make an internal conbustion engine at home. It’s not that you will be able to use it somethere, but it’s going to be enough to wow your friends.</p>
<p>So, you’re going to need a can, CD, some foam rubber, a couple of screws and a few clips.</p>
<p><br />
Advertisement:<hr />
<center>
<!-- ER-inside-post-unit -->
<div id='div-gpt-ad-1320784624914-0' style='width:300px; height:250px;'>
<script type='text/javascript'>
googletag.cmd.push(function() { googletag.display('div-gpt-ad-1320784624914-0'); });
</script>
</div>
</center>
<hr />
<br /><span id="more-94730"></span></p>
<p><img src="http://media.englishrussia.com/112012/internalcombustionenginecan/internalcombustionenginecan-20.jpg" alt="" /></p>
<p>Here’s the can (we chose sprats in tomato sauce).</p>
<p><img src="http://media.englishrussia.com/112012/internalcombustionenginecan/internalcombustionenginecan-24.jpg" alt="" /></p>
<p>Eat the sprats and wash the can.</p>
<p><img src="http://media.englishrussia.com/112012/internalcombustionenginecan/internalcombustionenginecan-27.jpg" alt="" /></p>
<p>Take the foam rubber.</p>
<p><img src="http://media.englishrussia.com/112012/internalcombustionenginecan/internalcombustionenginecan-30.jpg" alt="" /></p>
<p>Cut out a circle. Make its diameter a couple of millimeters smaller than the diameter of the can, while its height should be a little more than the half of the height of the can.</p>
<p><img src="http://media.englishrussia.com/112012/internalcombustionenginecan/internalcombustionenginecan-33.jpg" alt="" /></p>
<p>Make a hole in the center of the cover for a connecting rod.</p>
<p><img src="http://media.englishrussia.com/112012/internalcombustionenginecan/internalcombustionenginecan-36.jpg" alt="" /></p>
<p>Use a clip to make a spiral and solder it to the cover.</p>
<p><img src="http://media.englishrussia.com/112012/internalcombustionenginecan/internalcombustionenginecan-39.jpg" alt="" /></p>
<p>Pierce the foam rubber circle with a screw and fix it with washers from both sides. Tighten the screw. Then solder a piece of a straightened clip.</p>
<p><img src="http://media.englishrussia.com/112012/internalcombustionenginecan/internalcombustionenginecan-42.jpg" alt="" /></p>
<p>Insert a displacer into the hole in the cover and solder the can. At the end of the clip, make an eyelet and make one more hole in the cover which will be a little bigger than the previous one.</p>
<p><img src="http://media.englishrussia.com/112012/internalcombustionenginecan/internalcombustionenginecan-45.jpg" alt="" /></p>
<p>Make a cylinder by soldering.</p>
<p><img src="http://media.englishrussia.com/112012/internalcombustionenginecan/internalcombustionenginecan-48.jpg" alt="" /></p>
<p>Solder it to the can.</p>
<p><img src="http://media.englishrussia.com/112012/internalcombustionenginecan/internalcombustionenginecan-51.jpg" alt="" /></p>
<p>Use another clip to make a crankshaft.</p>
<p><img src="http://media.englishrussia.com/112012/internalcombustionenginecan/internalcombustionenginecan-54.jpg" alt="" /></p>
<p>Use more clips to make supports for the crankshaft. Pull some polyfilm on the cylinder and fix it with a thread. It’s going to be a membrane.</p>
<p><img src="http://media.englishrussia.com/112012/internalcombustionenginecan/internalcombustionenginecan-57.jpg" alt="" /></p>
<p>Take a piece of a clip and a rubber cork to make two connecting rods.</p>
<p><img src="http://media.englishrussia.com/112012/internalcombustionenginecan/internalcombustionenginecan-60.jpg" alt="" /></p>
<p>Stick the one with the cork to the membrane and the other one to the displacer.</p>
<p><img src="http://media.englishrussia.com/112012/internalcombustionenginecan/internalcombustionenginecan-63.jpg" alt="" /></p>
<p>Made legs out of clips and solder them to the can. Then fasten a flywheel (the CD) to the crankshaft.</p>
<p><img src="http://media.englishrussia.com/112012/internalcombustionenginecan/internalcombustionenginecan-67.jpg" alt="" /></p>
<p>Here it is!</p>
<!-- YouTube Embed v2.4 | http://www.artiss.co.uk/artiss-youtube-embed -->
<iframe frameborder="0" style="border: 0;" class="youtube-player" width="640" height="360" src="http://www.youtube.com/embed/cE660rfjL9c?version=3&fs=0&rel=0&title=%D0%A1%D0%B0%D0%BC%D0%BE%D0%B4%D0%B5%D0%BB%D1%8C%D0%BD%D1%8B%D0%B9+%D0%94%D0%B2%D0%B8%D0%B3%D0%B0%D1%82%D0%B5%D0%BB%D1%8C+%D0%A1%D1%82%D0%B8%D1%80%D0%BB%D0%B8%D0%BD%D0%B3%D0%B0%3C%2Ftitle%3E%3Ccont&wmode=opaque" ></iframe>
<!-- End of YouTube Embed code -->
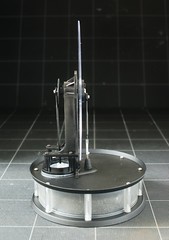
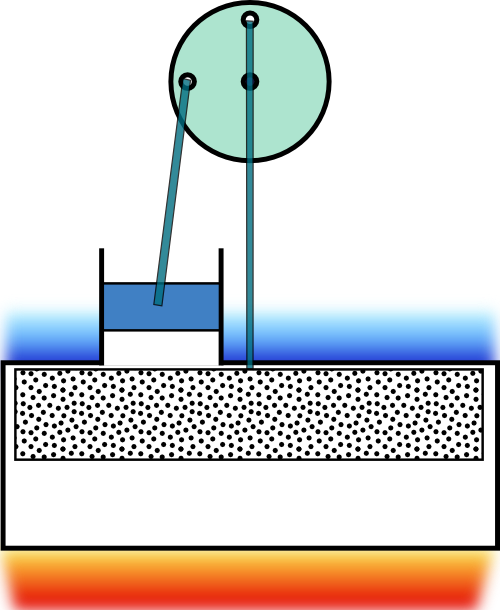
<p>That’s the engine you are supposed to make.</p>


